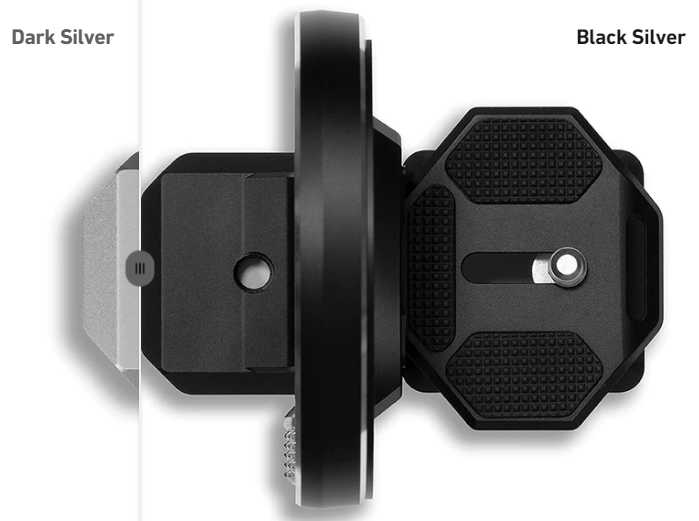
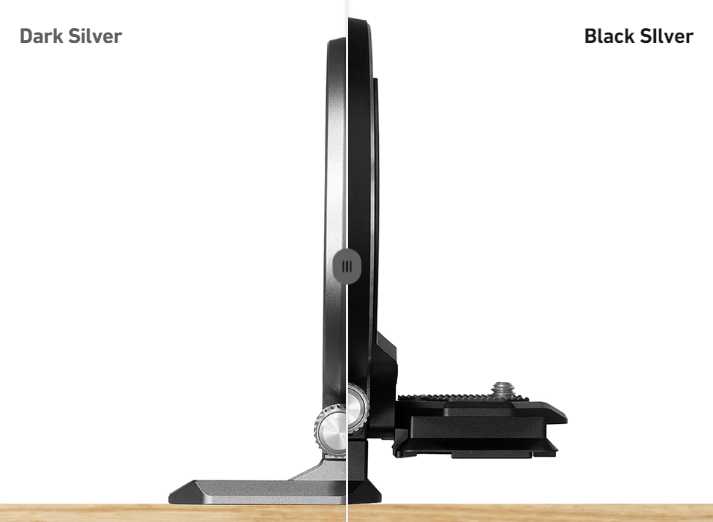
WHAT DIFFERENCES ARE THERE BETWEEN THE BLACK AND THE GRAY ATOLL?
MAINLY THERE ARE 3 CHANGES
In addition to the black color, which is obvious, there are 2 more changes:
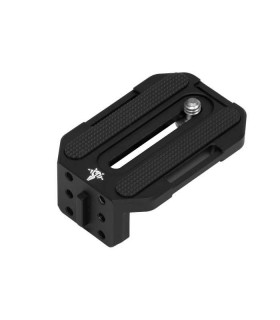
The first is that the shoe that goes to the tripod is now square allowing the ATOLL to be mounted in any position, very useful for people who use nodal rails.
The second change is the height of the shoe that goes to the camera, it now has 5mm more play, making it perfect for some small cameras like the SONY A6600
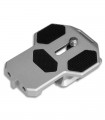
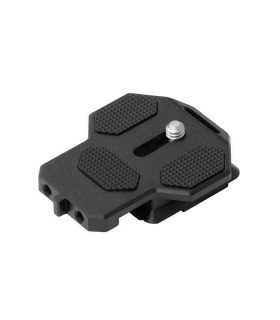
ARE YOU FED UP WITH YOUR L-BRACKET?
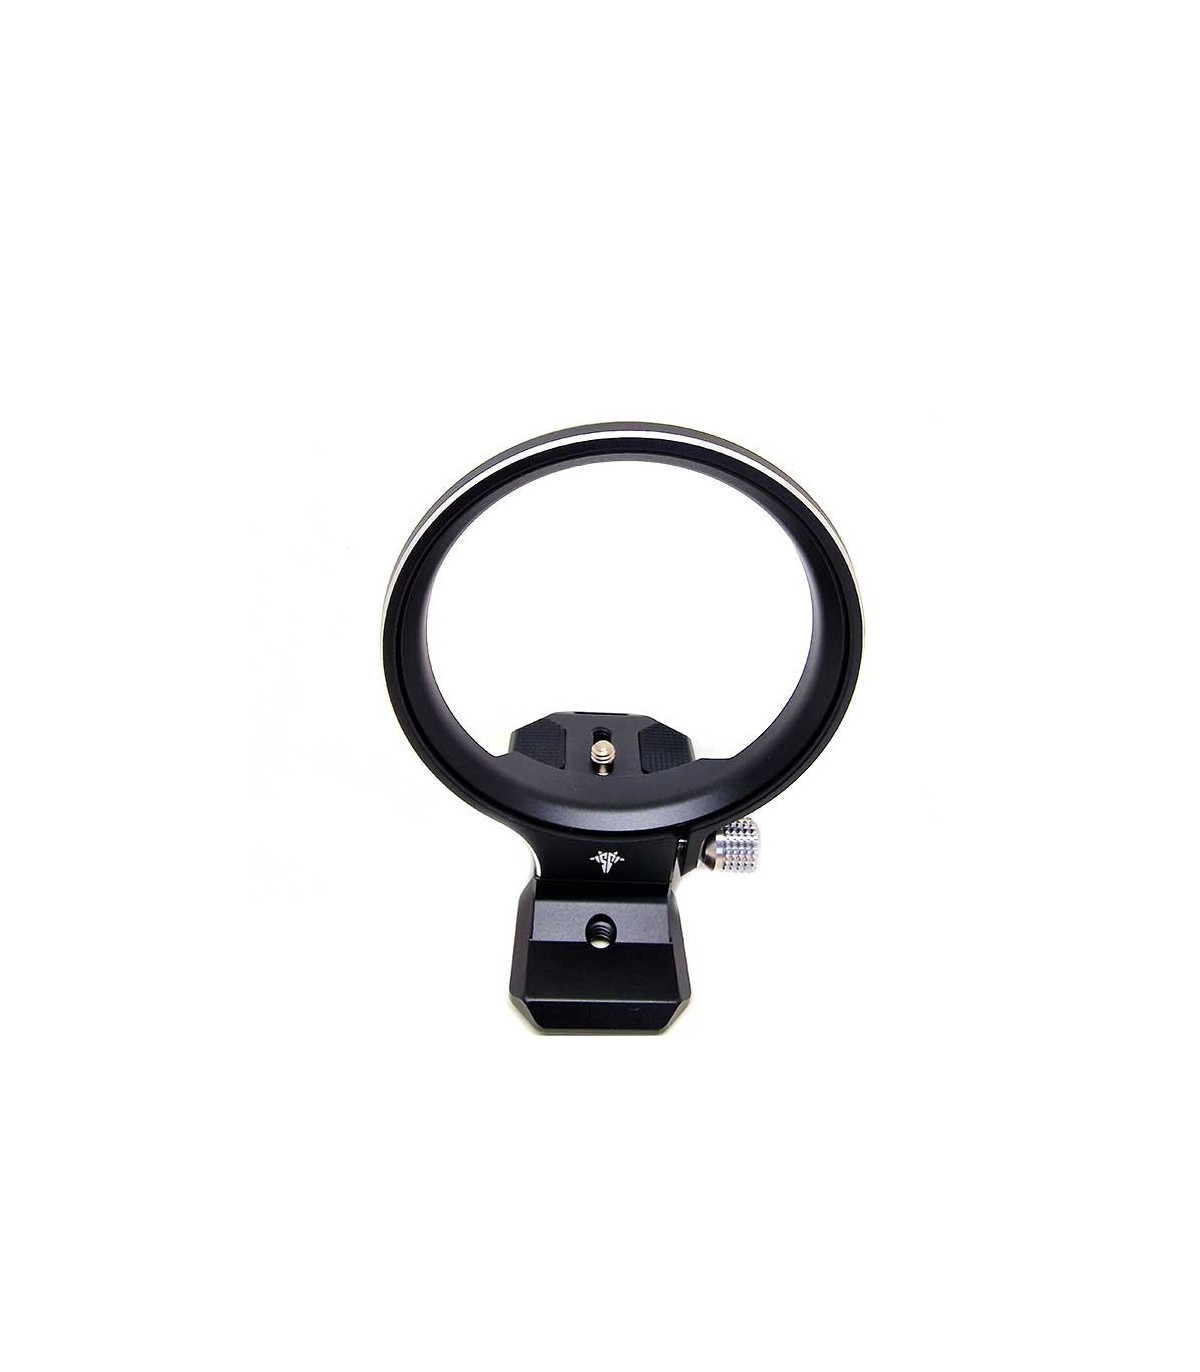
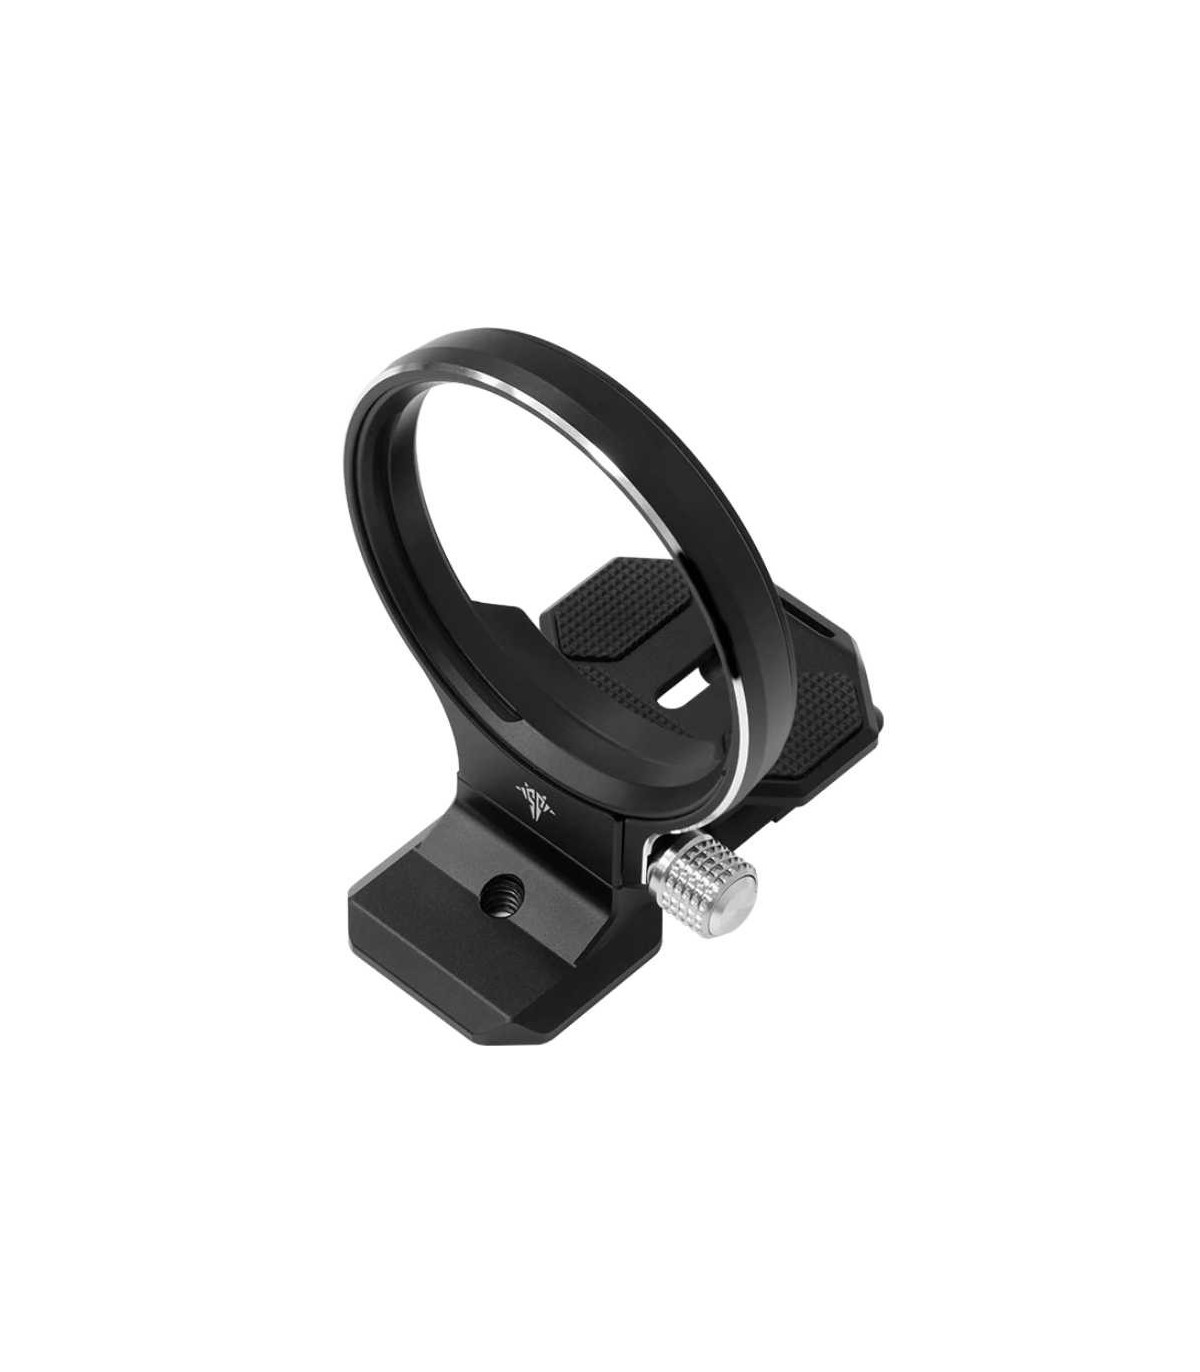
With the ATOLL ring from the company SILENCE CORNER you will no longer have to suffer with your L-Bracket, now with a simple turn you can have the camera vertical or horizontal thanks to the ATOLL rotating ring.
Forget about problems with cables or the rotating screen of your camera, now it will be very comfortable to work with your camera at any angle without worrying about it touching your L-bracket.
A REVIEW FROM DANIEL KORDAN
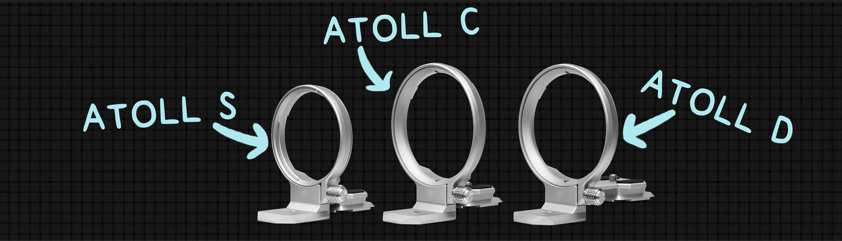
HOW TO SELECT YOUR ATOM
Depending on your camera model, one ATOLL size or another is necessary, look at the tables and the initial comments to be able to select the ATOLL that your camera needs. Depending on the model, an adapter will also be necessary, which must be purchased separately.
ATOLL COMPATIBLE LIST
The mounting position of ATOLL is designed to be close to the lens mount, As long as the outer diameter (4) of the lens mount is smaller than the inner diameter (3) of ATOLL, it can be mounted. The reason for this design is that the diameter (4) of the lens mount is usually small, so that we don't need to design a too large ATOLL.
PD Capture V3 can only fit in ATOLLs from up to down direction.
All tilt-shift lens cannot be mounted.
Most of Sigma and Tamron f/2.8 DSLR lens diameter exceeds the inner diameter of ATOLL and cannot be mounted. ex:
SIGMA 14-24mm F/2.8 DG HSM Art
SIGMA 24-70mm F/2.8 DG OS HSM ART
Tamron SP 15-30mm F/2.8 Di VC USD G2 (A041)
Tamron SP 24-70mm F/2.8 Di VC USD G2(A032)
But, Mirrorless version can be installed. ex:
SIGMA 14-24mm F/2.8 DG DN Art
SIGMA 24-70mm F/2.8 DG DN Art
Tamron 17-28mm F/2.8 DiIII RXD (A046)
Tamron 28-75mm F/2.8 DiIII RXD (A036)
Tamron 35-150mm F/2-2.8 DiIII VXD (A058)
note: ATOLL S is compatible with 35-150, but because of the USB port on the lens, ATOLL needs to be close to the camera, which will reduce the space of the lens release button. It might makes it difficult for you to change lenses, it's a considerable point.
For cameras with a protruding top (such as Nikon D600/D750) the flash of the camera will be stuck with ATOLL and can only be rotated to 135 degrees but not 180 degrees.
Models with the Remote control port or function button in front of the camera will be covered by ATOLL. EX: Canon R5/5D4
Some lenses have a switch button on the left side, if the switch button is close to the camera, it may be covered by ATOLL
you need to adjust the front and rear positions of the ATOLL to achieve the best space,but if the switching button is very close to the camera adapter (within 2cm), it will be covered by ATOLL and cannot be used. This is unavoidable, please pay attention before purchasing.
The focus ring/zoom ring on some lenses is very close to the camera adapter (within 2cm), it will be covered by ATOLL and cannot be used, this is unavoidable, please pay attention before purchase.
If the lens release button is on the left side of the camera, when you need to change the lens in the vertical mode the release button may be covered by ATOLL. you need to adjust the front and rear positions of the ATOLL to achieve the best finger space.
Because ATOLL is mounted on the camera, can't balance the camera optimally like a tripod collar with long lenses. If you use a long lens over 200mm or more than 1kg, it is recommended to use it with the original tripod collar for the most stable operating experience.
ATOLL is suitable for general DSLR and mirrorless cameras, The following cameras are not compatible with ATOLL
Flagship cameras (similar to Canon 1DX/Canon R3/Nikon D4/Nikon Z9)
Medium format cameras(like Fujifilm GFX100S)
Camera with battery grips or body cages
SONY
The inner diameter of the ATOLL S is 63.5mm, and lenses larger than 63.5mm in diameter cannot be mounted.
Most Sony E-mount lenses are compatible with ATOLL S
Even a telephoto lens can be mounted (just for example, for better balance, telephoto lens please use its own tripod collar)
Some manual lenses have a large diameter and cannot be installed.
The lens release button will be covered by the ATOLL, need to adjust the front and rear position of the ATOLL to get the best finger space. Please check the installation guide video.
Because the body of Sony α series cameras is very compact(such as A7S/A73/A7R3, etc. or earlier cameras) the space between the fingers and the camera grip will be affected. For users with larger fingers or when wearing gloves the space will be more limited. Adjust the front and rear position of the ATOLL to achieve the best space.
Teleconverter Lens is not compatible.
MODELS
ATOLL S
ATOLL C
ATOLL D
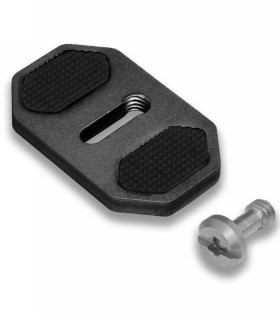
HIGHTENING PLATE
NOTE
A6000/A6300/A6500
V
RECOMMENDED
See note S1
A6100/A6400/A6600
V
RECOMMENDED
See note S1
ZV-E10
V
RECOMMENDED
See note S1
FX30/FX3//A7C/A1/A9/A92
V
See note S1
A7/A72/A73/A74
V
See note S1
A7R/A7R2/A7R3/A7R4/A7R5
V
See note S1
A7S/A7S2/A753
V
See note S1
NOTE S1
- Compatible with Sigma MC11 adapter
- Not Compatible Sony LA-EA5 adapter, Metabones adapter or other adapters not listed.
- A6XXX & ZV-E10 series cameras are low in height,It is recommended to use add-ons Heightening Plate for more adjustment space.
CANON
The inner diameter of the ATOLL C/D is 75mm, and lenses larger than 75mm in diameter cannot be mounted.
The recommended maximum mountable lens for Canon RF mount is RF 70-200 f/2.8.
The recommended maximum mountable lens for Canon EF mount is EF 16-35 F/2.8L II.
EF16-35F/2.8L III and EF24-105 F/4L and EF24-70 F2.8 L II or larger diameter lenses can be installed, but the gap with ATOLL is very small, and there is a risk of scratching the lens, So it is not recommended to use it with ATOLL.
ATOLL C is compatible with most RF lenses
If you use the EF-RF adapter, ATOLL C is also compatible with it
If you use Drop-in adapter, you can only use ATOLL D, otherwise it will be blocked.
But due to the installation of ATOLL D, it will not be possible to install RF lenses, If you sometimes use the adapter and sometimes don’t, then we suggest you choose ATOLL C and add an extension plate.
The body of ATOLL C and ATOLL D are the same. The difference is the length of the quick release plate.You can replace the quick release plate on the ATOLL C with an Extended quick release plate, it will become ATOLL D.
MODELS
ATOLL S
ATOLL C
ATOLL D
HIGHTENING PLATE
NOTES
R/R5/R6/R6 II
V
See note C1
RP/R7/R10
V
REQUIRED
See note C1
550D/650D/760D/77D/850D
V
REQUIRED
50D/60D/70D/80D/90D/7D/7D2
V
See note C2
6D/6D2
V
See note C2
5D/5D2/5D3/5D4/5DS/5DSR
V
See note C2
NOTE C1
Compatible with Ef-RF adapter
When use ATOLL C :Control Ring adapter & Drop-In Filter Mount adapter or other adapters not listed can't be used.
When use ATOLL D : Drop-In Filter Mount adapter can be used.
NOTE C2
ATOLL cannot fully align to the lens center, EF 11-24 f/4 & EF16-35 F/2.8 III & EF24-70 f/2.8 II or larger lenses cannot be mounted.
NOTE C3
Zoom ring of EF 11-24 f/4 & EF16-35 f/2.8 III & EF24-70 f/2.8II or larger lenses may interfere with ATOLL and is not recommended.
NIKON
The inner diameter of the ATOLL C/D is 75mm, and lenses larger than 75mm in diameter cannot be mounted.
The recommended maximum mountable lens for Nikon Z mount is Nikon 24-70mm f/2.8S.
When using with FTZ, the ATOLL is mounted on the FTZ, not the camera.
When using with FTZ, it can only be used with ATOLL C
When using with FTZ II, ATOLL is mounted to the camera.
If you use FTZ II, it can be used with ATOLL C or ATOLL D
Because the flash of Nikon DSLR is very protruding, many lenses cannot be mounted, so we do not recommend installing ATOLL on Nikon DSLR.
MODELS
ATOLL S
ATOLL C
ATOLL D
HIGHTENING PLATE
NOTES
Z5/Z6/Z6II/Z7/Z7II
V
RECOMMENDED
See note N1
Z5/Z6/Z6II/Z7/Z7II
V
REQUIRED
See note N2
Z30/Z50/Zfc
V
REQUIRED
See note N3
D3500/D5600
V
REQUIRED
See note N4
D80/D90/D300/D300S/D500
V
See note N4
D7000/D7100D/7200/D7500
V
See note N4
D600/D610/D700/D750/D780
V
See note N4
Note N1
Comparing to use with an ATOLL D, using with an ATOLL C have advantage of smaller size and weight, but disadvantage of smaller operation space of function buttons on lenses. See installation guide Nikon Z series part for more pictures.
There are two ways to align ATOLL C to the lens center of Nikon Z series cameras
Add-ons a Heightening Plate. (Recommended)
Disassemble the ATOLL, as shown in this video (there is grease inside, please be careful) https://youtu.be/mktHdhu2xss
With only ATOLL C, it cannot fully align to the lens center, But most of the Z-series lenses like Nikon Z 14-24 f/2.8 & 24-70 f/2.8 can be mounted.
Compatible with FTZ II adapter.
ATOLL cannot fully align to the lens center with a FTZ adapter, and non-NIKON lenses may not be mounted.
Note N2
Comparing to use with an ATOLL C, using with an ATOLL D have disadvantage of bigger size and weight, but advantage of bigger operation space of function buttons on lenses. See installation guide Nikon Z series part for more pictures.
ATOLL D with heightening plate can fully align to the lens center, And most of the Z-series lenses like Nikon Z 14-24 f/2.8 & 24-70 f/2.8 can be mounted.
Compatible with FTZ II adapter.
ATOLL cannot fully align to the lens center with a FTZ adapter, and non-NIKON lenses may not be mounted.
Note N3
ATOLL cannot fully align to the lens center,But most of the Z-series lenses like Nikon Z 14-24 f/2.8 & 24-70 f/2.8 can be mounted.
Compatible with FTZ II adapter.
ATOLL cannot fully align to the lens center with a FTZ adapter, and non-NIKON lenses may not be mounted.
Note N4
Nikon DSLR cannot use F/2.8 Constant Aperture Lens (Big ternary lens) or lens with larger diameter after installing ATOLL.
If you want to install a F/2.8 Constant Aperture Lens or a lens with a larger diameter, the user must put the ATOLL close to the camera adapter.
Except for D750 or D800 series, all other Nikon DSLR flashes will prevent ATOLL from getting close to the camera adapter.
ATOLL can only rotate to 135 degrees when it is close to the camera adapter
D300/D500/D800 series and D700 cannot be completely aligned with the center of the lens, and there is a risk of rubbing the lens with F/2.8 Constant Aperture Lens.
FUJI
MODELS
ATOLL S
ATOLL C
ATOLL D
HIGHTENING PLATE
NOTES
XH1/XT2/XT3
V
REQUIRED
See note F1
XT4/XT5/X-H2S
V
REQUIRED
See note F1
Note F1
ATOLL cannot fully align to the lens center, But it can still works with most of Fujifilm lenses.
The battery cover of XT5 will be blocked by ATOLL, and the battery cannot be replaced.
PANASONIC
MODELS
ATOLL S
ATOLL C
ATOLL D
HIGHTENING PLATE
NOTES
GX8/GX9
V
REQUIRED
See note P1
G85/G9/GH5/GH5 II/GH6
V
REQUIRED
See note P1
S5
V
REQUIRED
S1
V
Note P1
ATOLL cannot fully align to the lens center, But it can still works with most of Panasonic lenses.
LEICA
MODELS
ATOLL S
ATOLL C
ATOLL D
HIGHTENING PLATE
SL/SL2
V
OLYMPUS
MODELS
ATOLL S
ATOLL C
ATOLL D
HIGHTENING PLATE
NOTES
EM5 II/EM5 III
V
REQUIRED
See note O1
EM1/EM1 II/EM1 III/OM1
V
REQUIRED
See note O1
Note O1
ATOLL cannot fully align the lens center, but it can still works with 7-14 & 12-40 & 40-150mm f/2.8 lenses.


 PRODUCT IMPORTED ON DEMAND (RETURNS ARE NOT ADMITTED)