Types of artificial lighting in photography
Light is everything in photography, light will help us tell stories only with its direction and intensity, without light objects cannot be seen and we cannot make any impression, in short we could say that without light there is no photography.
In DCAMARA we are going to talk about some basics of lighting in order to be able to experiment with our photos, obtaining different results from the same scene just by changing the orientation of the light. These types of lighting will help us greatly when it comes to taking our portraits, still lifes and macro photographs, it is true that we can apply these schemes with natural light, waiting for the ideal moment of light and looking for the right framing. If you are interested, we could create an article where you can see some basic lighting schemes, as well as some examples of types of lighting in photography, these lighting schemes are totally valid for types of studio lighting as well.
Depending on the light source from which the light comes, you can differentiate between two main types of lighting:
- Natural light
It is the cheapest light to work with, hahaha, it comes from the sun.
- Artificial light
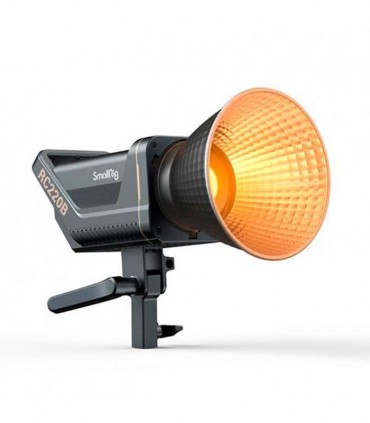
It is the light coming from lighting objects such as lamps, spotlights, flashes, leds, etc. all of them mounted and tinkered by the photographer. The most used lights right now are the COB, these are powerful LED lights like the SMALLRIG RC220B
Depending on the diffusion of light, we obtain the following types of light:
Hard light
This light projects a shadow with sharp and very defined edges. For example, when we use a high-power spotlight without a diffuser, the shadows will be very marked.
Soft light
This diffused light that barely casts shadows is produced when we use a spotlight with a large diffuser which diffuses the light, managing not to generate very marked shadows.
Semi-diffuse light
They are usually large light sources close to the object that emphasize the volume and texture of the object.
Depending on the direction of light, we get the following types of lighting:
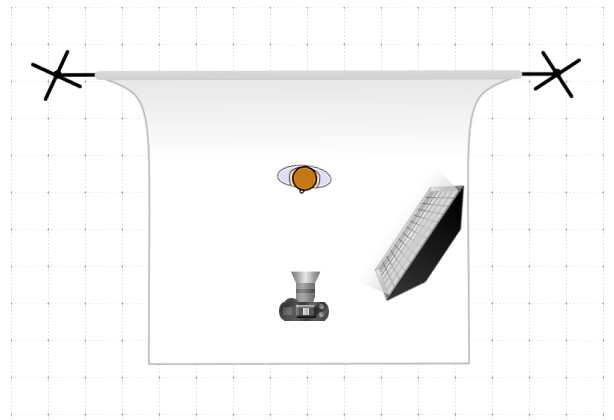
Front light
To get front lighting, we will place the light in front of the object to be photographed and behind the camera/photographer. The front light flattens the object and the shadows are hard light projections behind the object, we will get flat photos, without volume or textures. and with very little contrast.
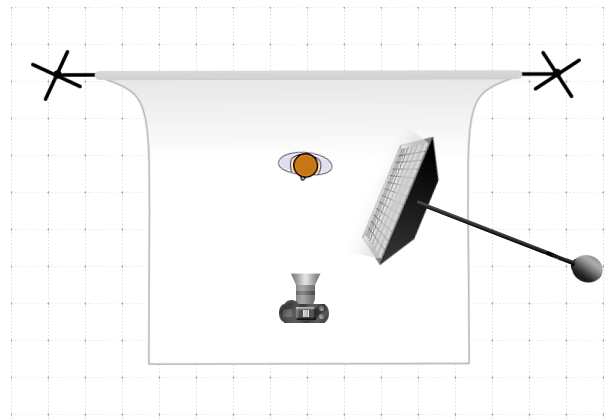
Side light
In this case, the light source must be mounted perpendicular to the object, that is, at 90º in a straight line with respect to the subject and the photographer, the light it receives is very harsh, creating many shadows, this causes one side of the subject to be very lit and the other not.
Using this type of lighting we will obtain photos in which the illuminated side appears in the shot with a lot of lighting while the other side will remain dark or with very marked shadows, to avoid these marked shadows we have to add a fill light to the scene in the opposite side to the main light, this will allow us not to lose any detail of the texture on the "shadow" side.

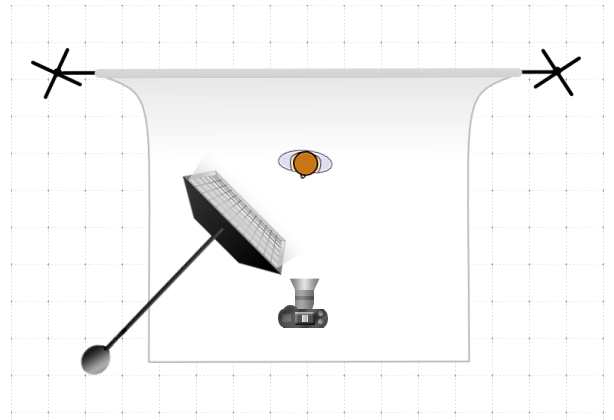
Semi-lateral light
The light source is positioned at 45º, it is a scheme that is between the front light and the side light, making the shadows favor the depth of the object.
The semi-lateral configuration is better known for being called "classic", being the most used by photographers because it throws us not very marked shadows, managing to highlight textures and provide contrast, thus favoring the subject.
Fill light
The fill lights are the secondary lights that will help us fill in and lift those areas of marked shadows that we do not want, thus achieving a shot with better textures.
Backlight or ambient light
Normally it is a light that surrounds the object, it can be natural (window) or a general study light.
Backlighting
The lighting configuration opposite to the front light is normally called backlight or rear light, in this configuration the object will be between the light source and the camera, placing the focus behind the object and at the same time in front of the photographer.
It is widely used in artistic photography since by placing the light behind the object the silhouette will be marked, creating a great contrast between the background and the object, which will be very dark and the background illuminated.
This setting results in images with high contrast, turning the subject into a dark silhouette while the background appears bright, almost completely separating the subject from the background.
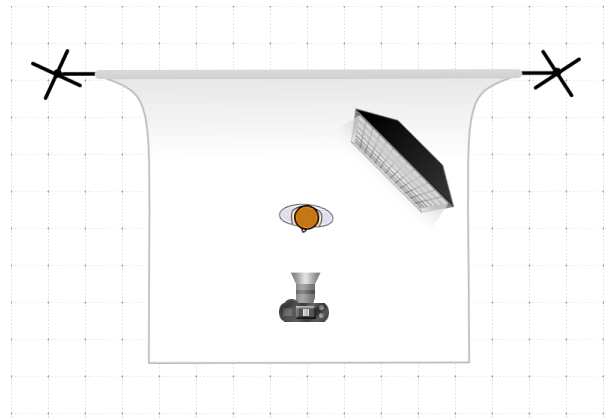
Parting light, contour, semi-backlight or hair light
The light source is always installed behind the object but on one side, we could say that the light source is at an intermediate point between the side light and the rear light (backlight), in this case the shadows highlight the textures of the object .
This scheme is used to distinguish the object from the background, with this lighting we achieve photographs in which the light highlights the textures (as with the semilateral one), the difference is that the shadows that are projected are shown in the foreground, in this way In this way we can appreciate only areas of the subject becoming silhouettes.
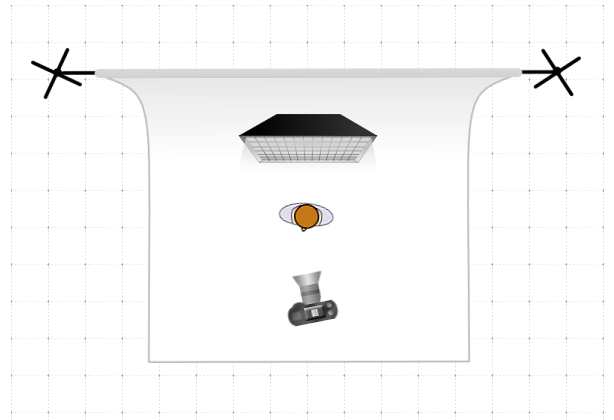
Overhead or chopped light
It is the light that is placed above the subject, producing very hard and vertical shadows, this creates very dark areas and areas with a lot of light, the light produced by the midday sun is a clear example of this lighting.
In portrait photography, you must be careful with this lighting since it generates very marked shadows in the lower part of the face and very illuminated areas in the upper part of it. This lighting is appropriate when we portray people in costumes or with makeup.
Nadir or low angle light
In the low angle view, the light is placed under the subject, producing shadows that are difficult for the photographer to manage. With this lighting, photos with a mysterious halo are achieved. In cinema, the nadir plane is widely used, the camera is located completely below the object with an angle perpendicular to the ground. Nadir light is used aesthetically to add interest, drama, fear, mystery, or dynamism to a scene.
This lighting is the opposite of overhead light, in this case the light source is placed below the subject, illuminating it from bottom to top.
What is the Nadir angle?
The nadir angle is when we take a low angle view and take it to the extreme, at the nadir angle we place the camera looking from the bottom up, leaving it perpendicular to the sky.
Using the Polarizing Filter and Effect Filters in Lighting Schemes
The polarizing filter is a great ally in portrait photos or objects since it will allow us to eliminate certain brightness, obtaining better textures of the subject to be photographed. Depending on the brightness to eliminate the assembly can be a little more complicated by having to use a polarizing filter on the camera and another on the flash.
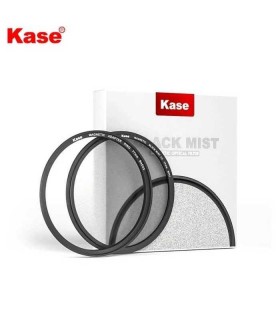
On the other hand, with effects filters such as the KASE Mirror filter we can slightly change the Bokeh of the lens, achieving very remarkable effects, especially in portraiture. We also have other filters such as the KASE Black Mist filter that will allow us to blur the highlights, giving us a halo of film to our photos.